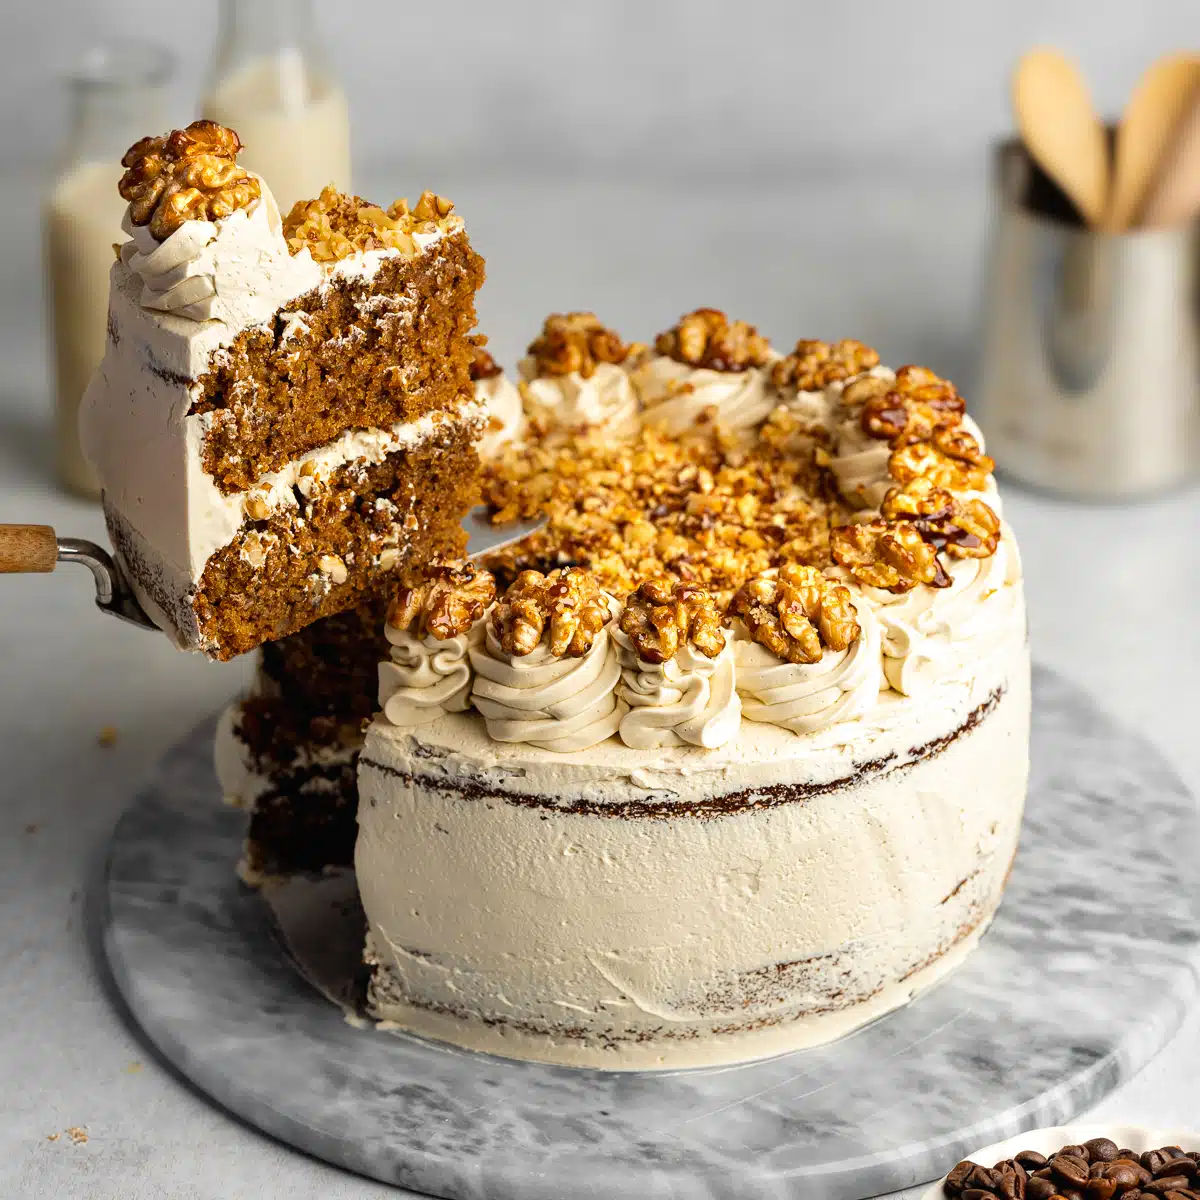

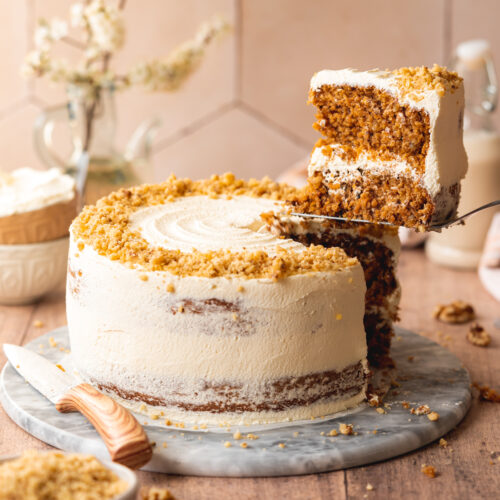
This easy vegan coffee and walnut cake is surprisingly easy to make and incredibly flavorsome. I recommend frosting it with homemade vegan coffee Swiss meringue buttercream that's light, airy, and not overly sweet.
Jump to:
📖 Recipe Overview
- Fluffy & Light Consistency - The cake layers are incredibly airy although packed with nuts. This is thanks to a combination of olive oil, vegan buttermilk, and leaveners which work together to create a light and moist crumb.
- Easy & Simple Ingredients - Most ingredients will likely already sit in your pantry, you don't need any fancy hard-to-pronounce vegan baking alternatives!
- Incredible Flavor - Between the intense espresso, toasty walnuts, and brown sugar this cake has a wonderful caramelized nutty coffee flavor, which is complemented by the light and airy frosting.
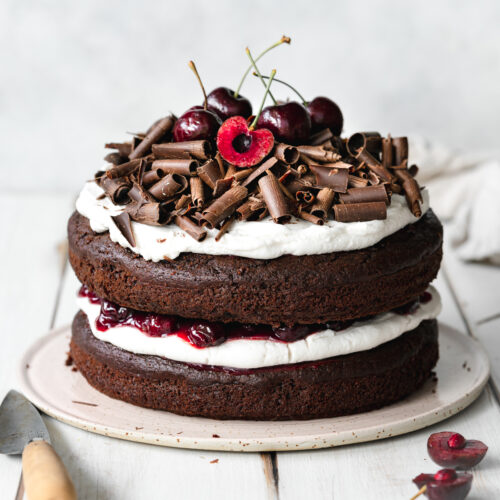
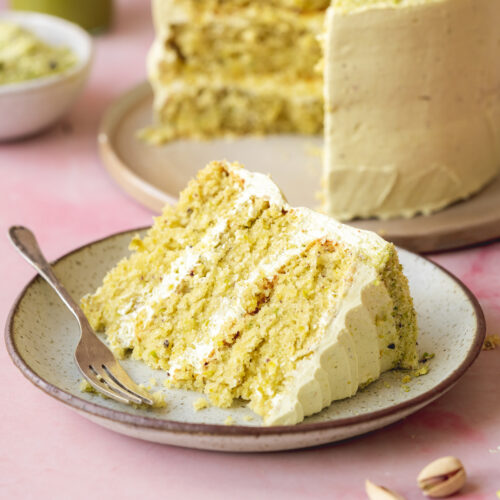
If you love fragrant nutty cakes, try my vegan recipes for date and walnut cake, pistachio cake, and chocolate hazelnut cake next!
🧾 Ingredients Needed
Along with the vegan coffee buttercream, you just need 10 simple ingredients to make this easy cake. Here's what to grab:
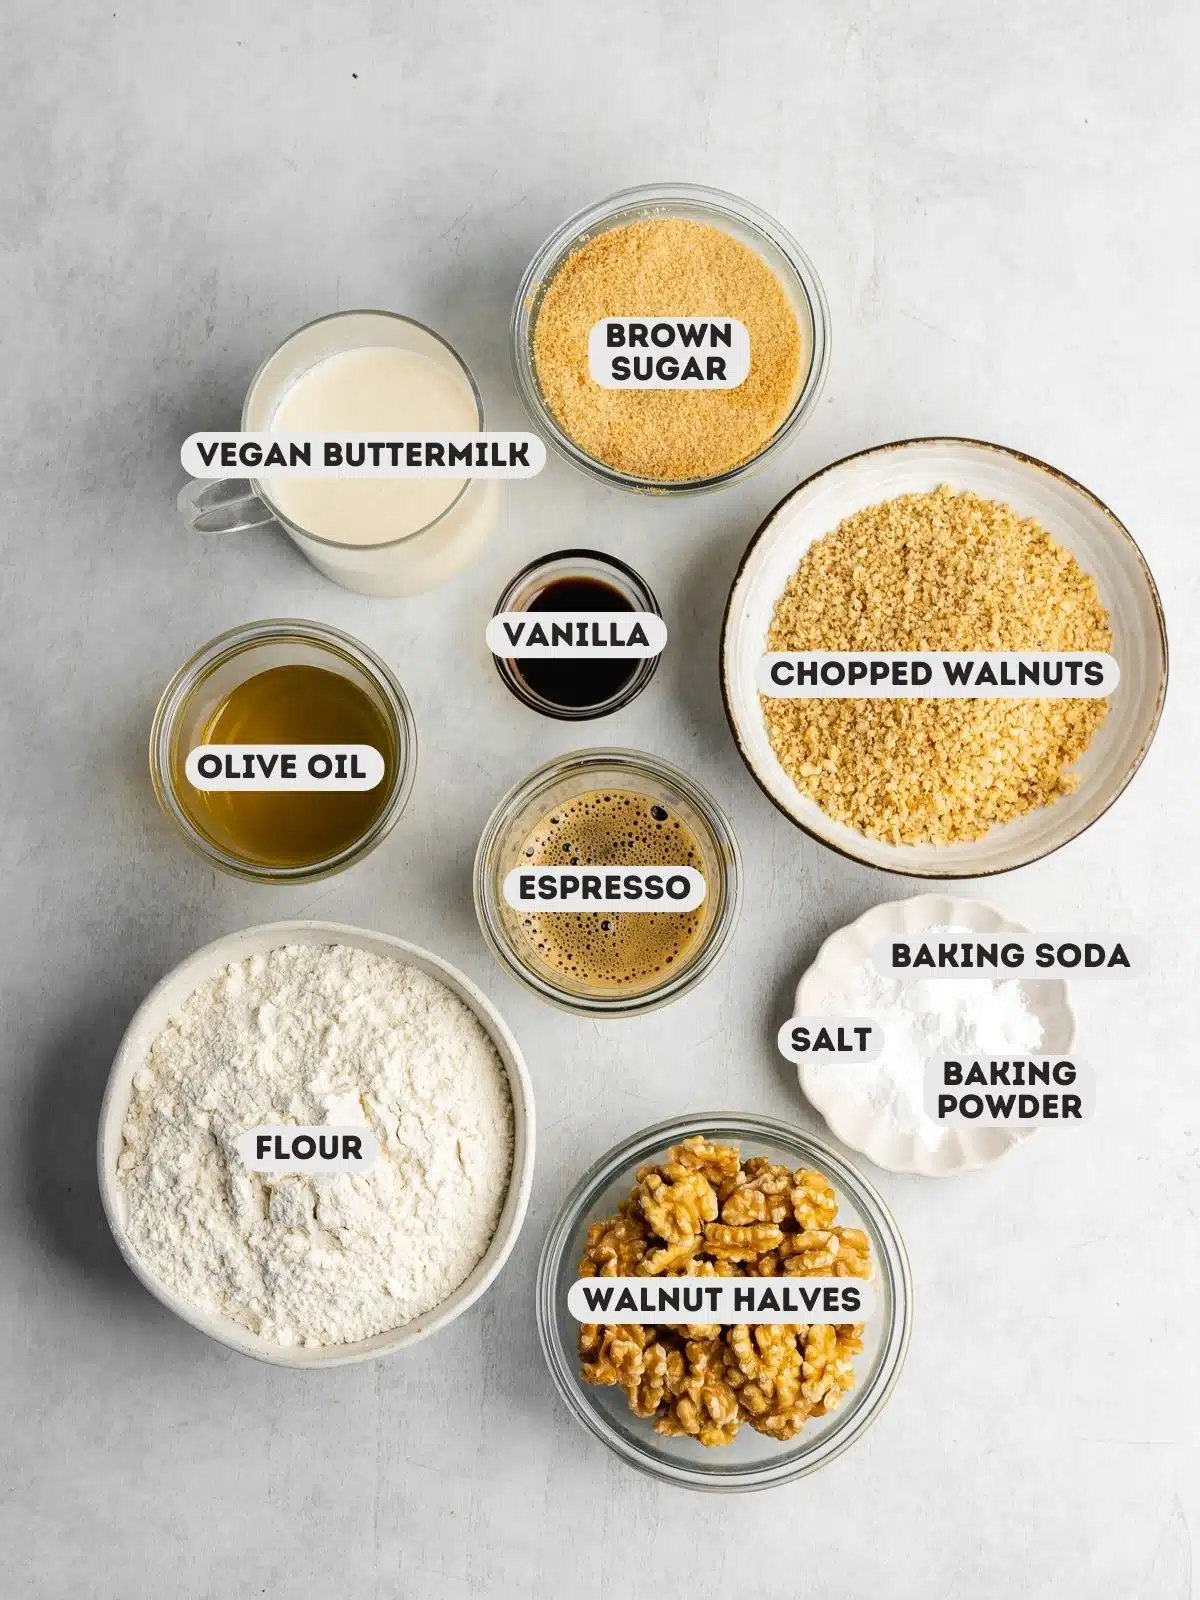
Ingredient Notes
- Walnuts - These are added to the batter and also candied for a delicious toasted crunchy topping and filling for the cake.
- Olive Oil - This is my go-to oil for vegan baking, but feel free to use a neutral oil such as sunflower or rapeseed if you prefer the subtle flavor.
- Vegan Buttermilk - A mixture of soy milk and apple cider vinegar. It is a must for the fluffiest eggless cakes. You can use oat milk or almond milk as well.
- Espresso - Freshly brewed espresso is best for this recipe, but you can also use very strong coffee.
- Soft Brown Sugar - I use light muscovado sugar which contains molasses unlike white sugar, and it adds a delicious caramelized flavor and moisture to the cake.
- Baking Powder & Baking Soda - These are leavening agents that will help the cake to rise. When combined with the acidic vegan buttermilk, they will activate during baking and create a light and fluffy cake.

🥣 How To Make Vegan Coffee Walnut Cake
Find the complete list of ingredients, quantities, and instructions in the recipe card at the end of this post.
This easy walnut cake comes together in just a few steps. You can adjust the volume of ingredients to make either 6-inch or 8-inch cakes. Here's a visual of how it's done:
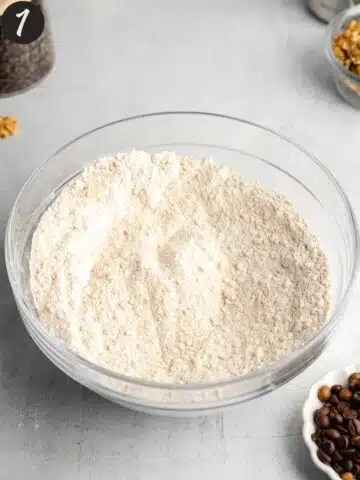
Step 1: Mix the dry ingredients in a large mixing bowl (flour, brown sugar, chopped walnuts, baking powder, baking soda, and sea salt).
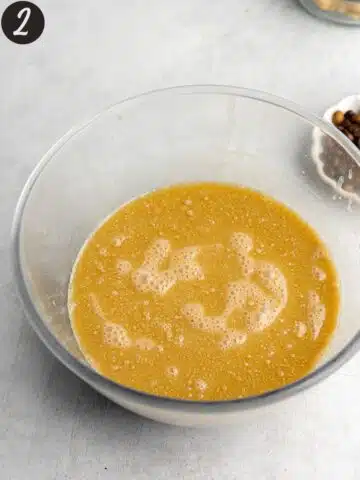
Step 2: In a separate medium bowl, whisk together the wet ingredients (coffee, oil, non-dairy buttermilk, and vanilla).
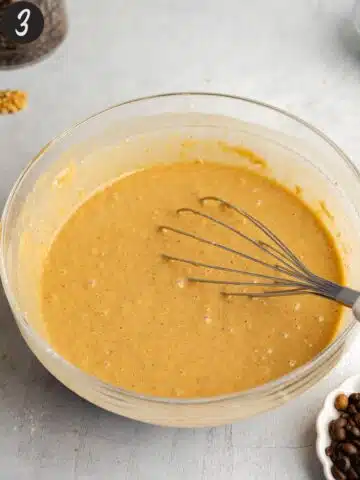
Step 3: Pour the wet into the dry ingredients and whisk until there are no visible pockets of flour.
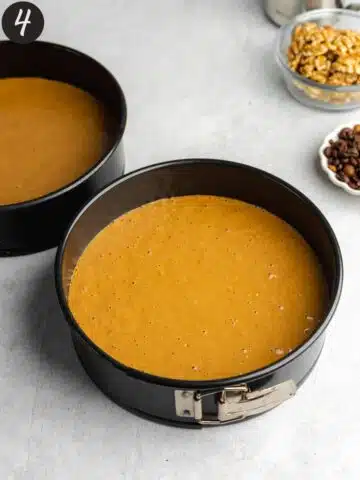
Step 4: Pour the mixture into greased cake pans and bake in your preheated oven.
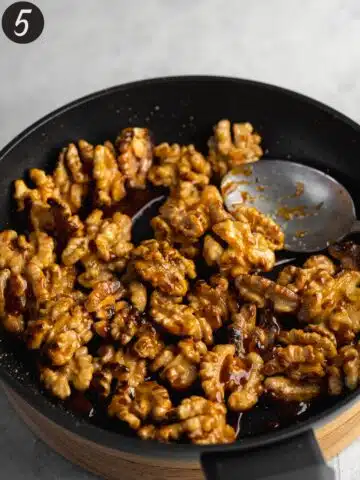
Step 5: Add walnuts, sugar, and butter or oil to a pan on gently cook for 5-7 minutes, tossing constantly. Once the sugar has melted and the walnuts are fragrant, remove from the heat. Transfer to a sheet of parchment to cool. Reserve 16 walnut halves for the topping, and chop the rest.
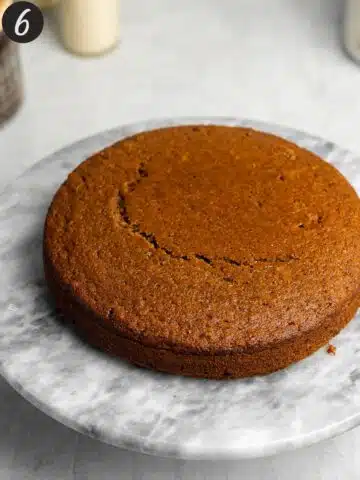
Step 6: Once baked, allow the cakes to cool in the tins for 15-20 minutes. Then carefully turn them out onto a cooling rack to cool further.
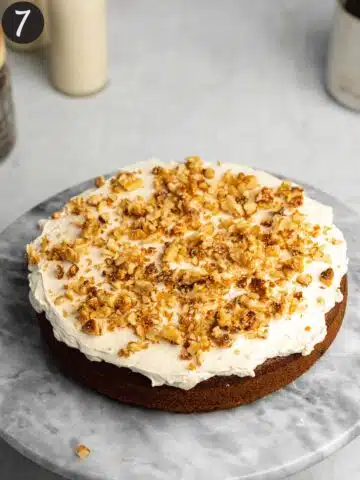
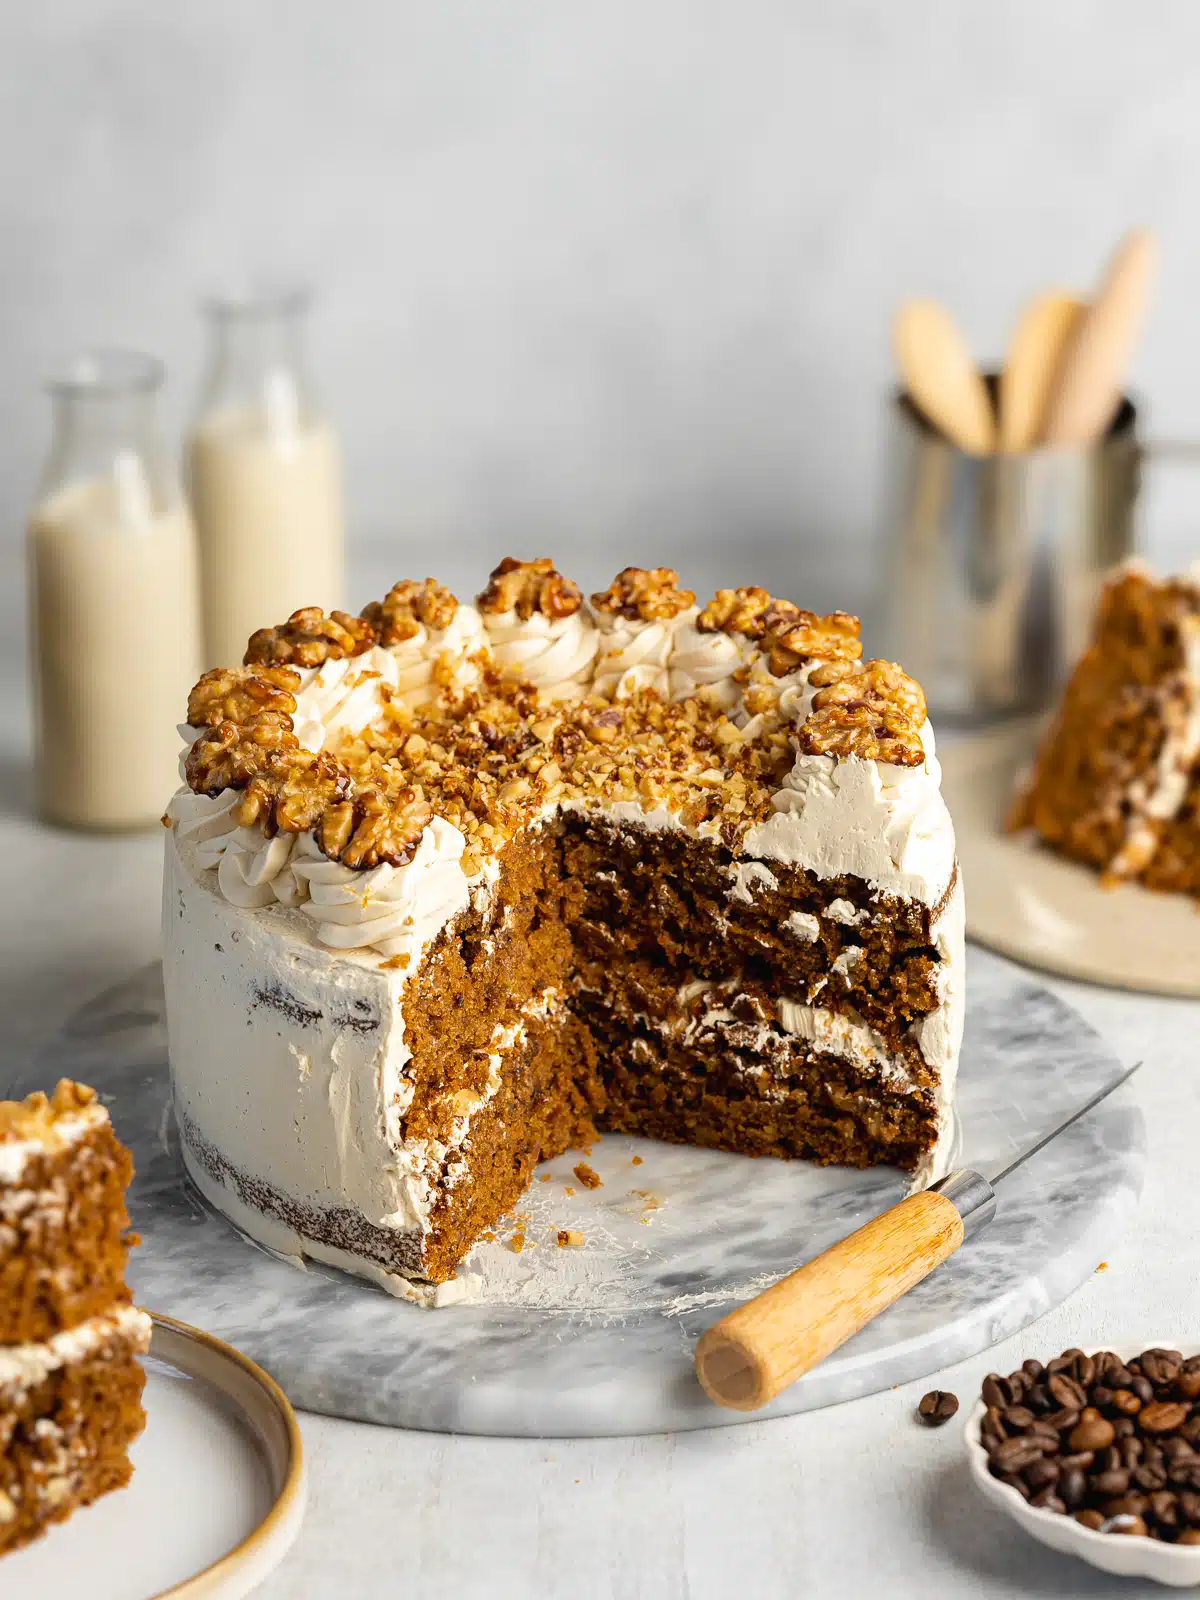
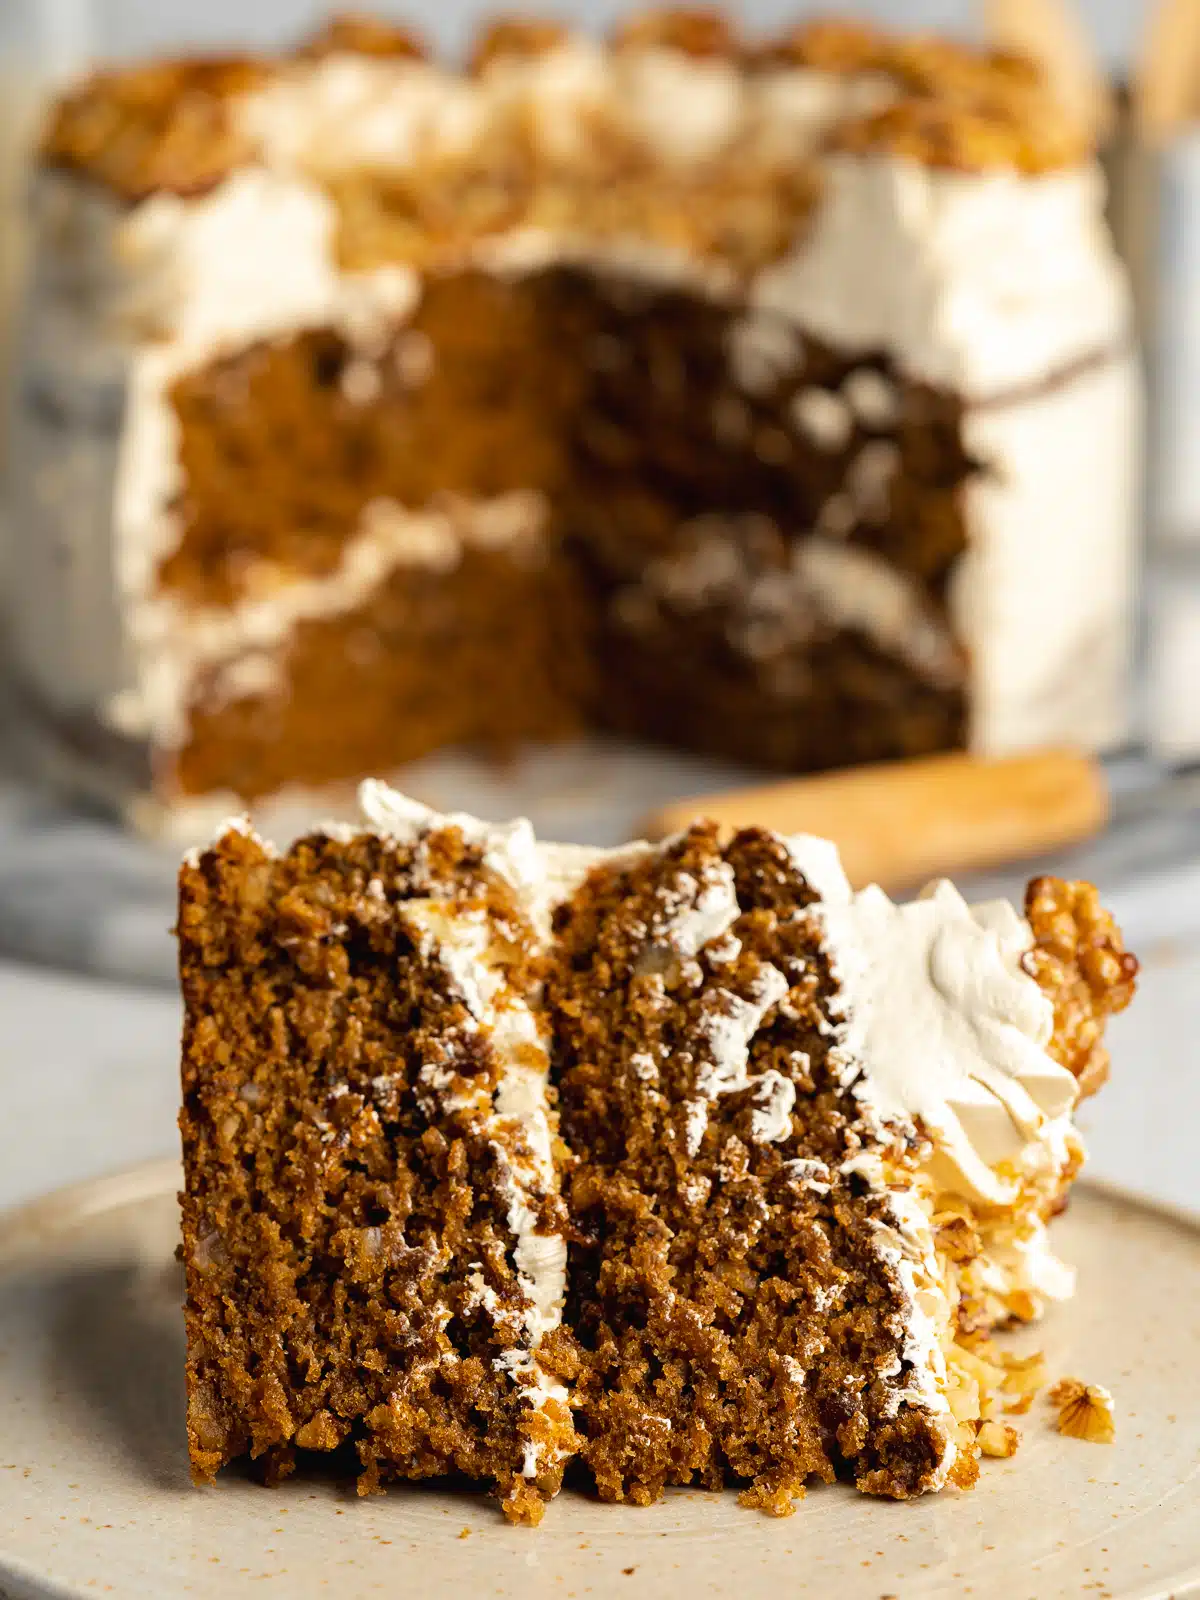
Step 7: To assemble, smooth around ⅓ of the frosting on top of the first cake layer, Follow this with half of the chopped candied walnuts. Top with the next cake layer and coat the sides and top of the cake with another ⅓ of the frosting.

Step 8: Lastly, pipe the remaining ⅓ of frosting on top of the cake. Top with the candied walnut halves. Sprinkle the remaining chopped walnuts on top of the cake.
☕ Variations
I love this walnut coffee cake as written, but here are some ways you can switch up the ingredients and decorations:
- Coffee Beans- A sparse amount of coffee beans on top of the cake will add a little crunch as well as a beautiful garnish. I emphasize *sparse* here as you probably don't want yourself or your guests to break out in a sweat from the extra caffeine they give to the cake!
- Chocolate Shavings - If you're a fan of all things mocha a few dark chocolate shavings or chocolate curls would be amazing on top of this cake.
- Walnut Coating - You can double the amount of candied walnuts, chop and stick them to the sides of the cake for extra nuttiness!
- Coffee And Pecan Cake - If you don't particularly enjoy walnuts or have an allergy, feel free to swap in pecans instead.
- Decaf Coffee Cake - Swap your regular espresso for decaf if you're watching your caffeine intake.
- Cream Cheese Frosting - If you want to pair back the coffee flavor a little and add some tang may I suggest this easy cream cheese buttercream.
📝 Recipe Tips
Cool your coffee. Unlike my vegan chocolate cake which uses hot coffee to bloom the cocoa powder, you will want to let your espresso come to room temperature before mixing it into the batter for this recipe.
Cake Pan Prep: Take the time to properly prepare your cake pans to ensure that your baked cakes come out easily. Use a vegan-friendly oil or spray, and line the bottom with parchment paper to ensure your layers come out cleanly.
Using a Cake Turntable: This makes frosting your walnut cake significantly more efficient. While frosting, spin the turntable with one hand and hold your spatula or bench scraper steady with the other to create a smooth finish.
💬 FAQs
Coffee and walnut cake is a classic British cake consisting of two layers of coffee-flavored sponge filled and topped with coffee buttercream.
Unlike American coffee cake, which does not contain coffee. Essentially, if you're a coffee lover (ahem, like me) then chances are that you'll love this cake. No surprises, it goes exceptionally well with a nice hot cup of coffee.
You can use instant coffee granules to flavor this cake, just make sure the quality is good. The coffee should taste good enough for you to want to drink it on its own!
This cake tastes best when served fresh. I recommend storing it in the fridge and taking it out at room temperature for an hour before serving.
You can freeze any leftover cake in an airtight container to serve another time.
I've only tested this vegan walnut cake with all-purpose flour, so I can't stand over the results of any other flour. A lot of readers report good results using a measure for measure GF all-purpose flour when making my cake recipes. I would suggest using a blend that contains xantham gum if you do want to give it a try!
Yes, the printable recipe card at the end of this post includes quantities for either version, so you can scale it according to how many servings you would like.
For a 9-inch single-tier cake, use the quantities stated for a double-layer 6-inch. Or for a 2-layer 9-inch, follow the quantities for a double-layer 8-inch cake, and reduce the baking time by 10 minutes. Then continue to bake it for another 5 minutes if needed.
🎂 More Vegan Cakes

Love this recipe? Please leave a 5-star ★★★★★ rating in the recipe card below and consider leaving a comment as well, thanks!
Stay in touch with me through social media @ Instagram, Pinterest, TikTok, and Facebook. And subscribe via email to get all our new recipes!
Description
Ingredients
Two x 6-inch Cakes (Serves 12)
- 100 g (1 cup) walnuts, finely chopped
- 260 g (2 cups) all-purpose flour, sifted
- 220 g (1 cups) soft brown sugar, *see note 1
- 2 ½ teaspoons baking powder
- ½ teaspoon baking soda
- ¼ teaspoon sea salt
- 120 ml (½ cup) espresso, or strong coffee - cooled to room temp *see note 2
- 1 batch (240ml) (1 cup) vegan buttermilk
- 120 ml (½ cup) olive oil, or neutral oil such as sunflower or rapeseed
- 1 tablespoon vanilla extract
Two x 8-Inch Cakes (Serves 16)
- 150 g (1 ½ cups) walnuts, finely chopped
- 400 g (3 cups + 3 tablespoons) all-purpose flour, sifted
- 330 g (1 ½ cups) soft brown sugar, *see note 1
- 3 ¾ teaspoons baking powder
- ¾ teaspoon baking soda
- ½ teaspoon sea salt
- 180 ml (¾ cup) espresso, or strong coffee - cooled to room temp *see note 2
- 1 ½ batches (360ml) vegan buttermilk
- 180 ml (¾ cup) olive oil, or neutral oil such as sunflower or rapeseed
- 1 ½ tablespoons vanilla extract
Toppings & Fillings
- 200 g (2 cups) walnut halves, for candied walnuts
- 2 tablespoons soft brown sugar or granulated sugar, for candied walnuts
- 1 tablespoon vegan butter, or olive oil, for candied walnuts
- 1 batch vegan coffee buttercream
Instructions
- For accuracy, I highly recommend measuring your ingredients in grams using a digital kitchen scale.
- Prepare: Preheat your oven to 160°C/320°F fan (180°C/356°F conventional). Line the base of two cake tins with a circle of parchment paper and liberally grease the sides with oil or vegan butter.
- Mix dry ingredients: In a large mixing bowl, whisk together the finely chopped walnuts, flour, soft brown sugar, baking powder, baking soda, and sea salt.
- Mix wet ingredients: In a separate medium bowl, whisk together the espresso, vegan buttermilk, olive oil, and vanilla extract.
- Make the batter: Pour the wet ingredients into the dry and whisk until there are no visible pockets of flour. Be careful not to over-mix.
- Bake: Divide the batter between the prepared cake tins and bake for 35-45 mins. Check the cakes are done by inserting a knife or toothpick into it, which should come out clean.
- Allow the cakes to cool in the pans for 10-15 minutes before carefully transferring them out onto a cooling rack. Allow them to fully cool before transferring them to the fridge in an airtight container until ready to use.
- Meanwhile, prepare the vegan coffee Swiss meringue buttercream.
- Candied Walnuts: Add walnuts, sugar, and butter or oil to a pan on gently cook for 5-7 minutes, tossing constantly. Once the sugar has melted and the walnuts are fragrant, remove from the heat and transfer to a sheet of parchment to cool. Reserve 16 walnut halves for the topping, and chop the rest for the filling and topping.
- Assembly: With an offset spatula, smooth around ⅓ of the frosting on top of the first cake layer, followed by half of the chopped candied walnuts. Top with the next cake layer and coat the sides and top of the cake with another ⅓ of the frosting.
- Lastly, pipe the remaining ⅓ of the frosting on top of the cake and top with the candied walnut halves. Sprinkle the remaining chopped walnuts on top of the cake.
- Storage: Store in an airtight container in the fridge for up to 4-5 days. Remove from the fridge about an hour before serving to allow the cake and frosting to soften a little. This cake tastes best when served fresh. You can however freeze any leftover cake in an airtight container to serve another time.
Notes
- Soft Brown Sugar: I use light muscovado.
- Espresso: Swap your regular espresso for decaf if preferred.
Nutrition
© addictedtodates.com. All content and images are protected by copyright. If you want to share this recipe, please do so using the share buttons provided. Do not screenshot or republish the recipe or content in full. instead, include a link to this post for the recipe.
*This recipe was originally published in September 2021. The recipe has since been improved and updated to simplify the instructions and include various pan sizes.
