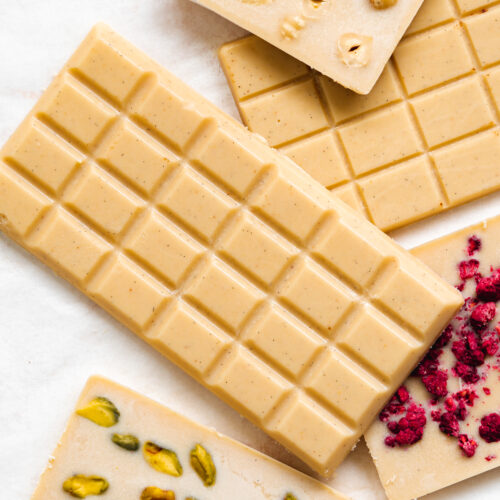
From spending the last 7+ years developing recipes, I have attempted my fair share of vegan chocolate recipes. When it comes to dairy-free chocolate bars I've tried versions that were too oily, not sweet enough, too bitter, too fudgy, and too soft. This vegan milk chocolate recipe, however, is by far the closest thing to that milky-tasting dairy chocolate I've ever made.
In this post, I'm going to take you through two different methods for making your own vegan milk chocolate at home. Using real cacao nibs, or using cacao paste with minimal equipment.
Jump to:
📖 Recipe Overview
Chocolate is usually made with a wet grinding machine (melanger). But grinders can cost a couple of hundred euros and aren't something you'd typically find in most kitchens.
So I wanted to create a recipe that anyone could try at home, without having to dish out buying expensive equipment that you might not necessarily get a lot of use out of. Here's what you can expect from this recipe:
- Delicious Taste - With a cream "milky" coconut flavor.
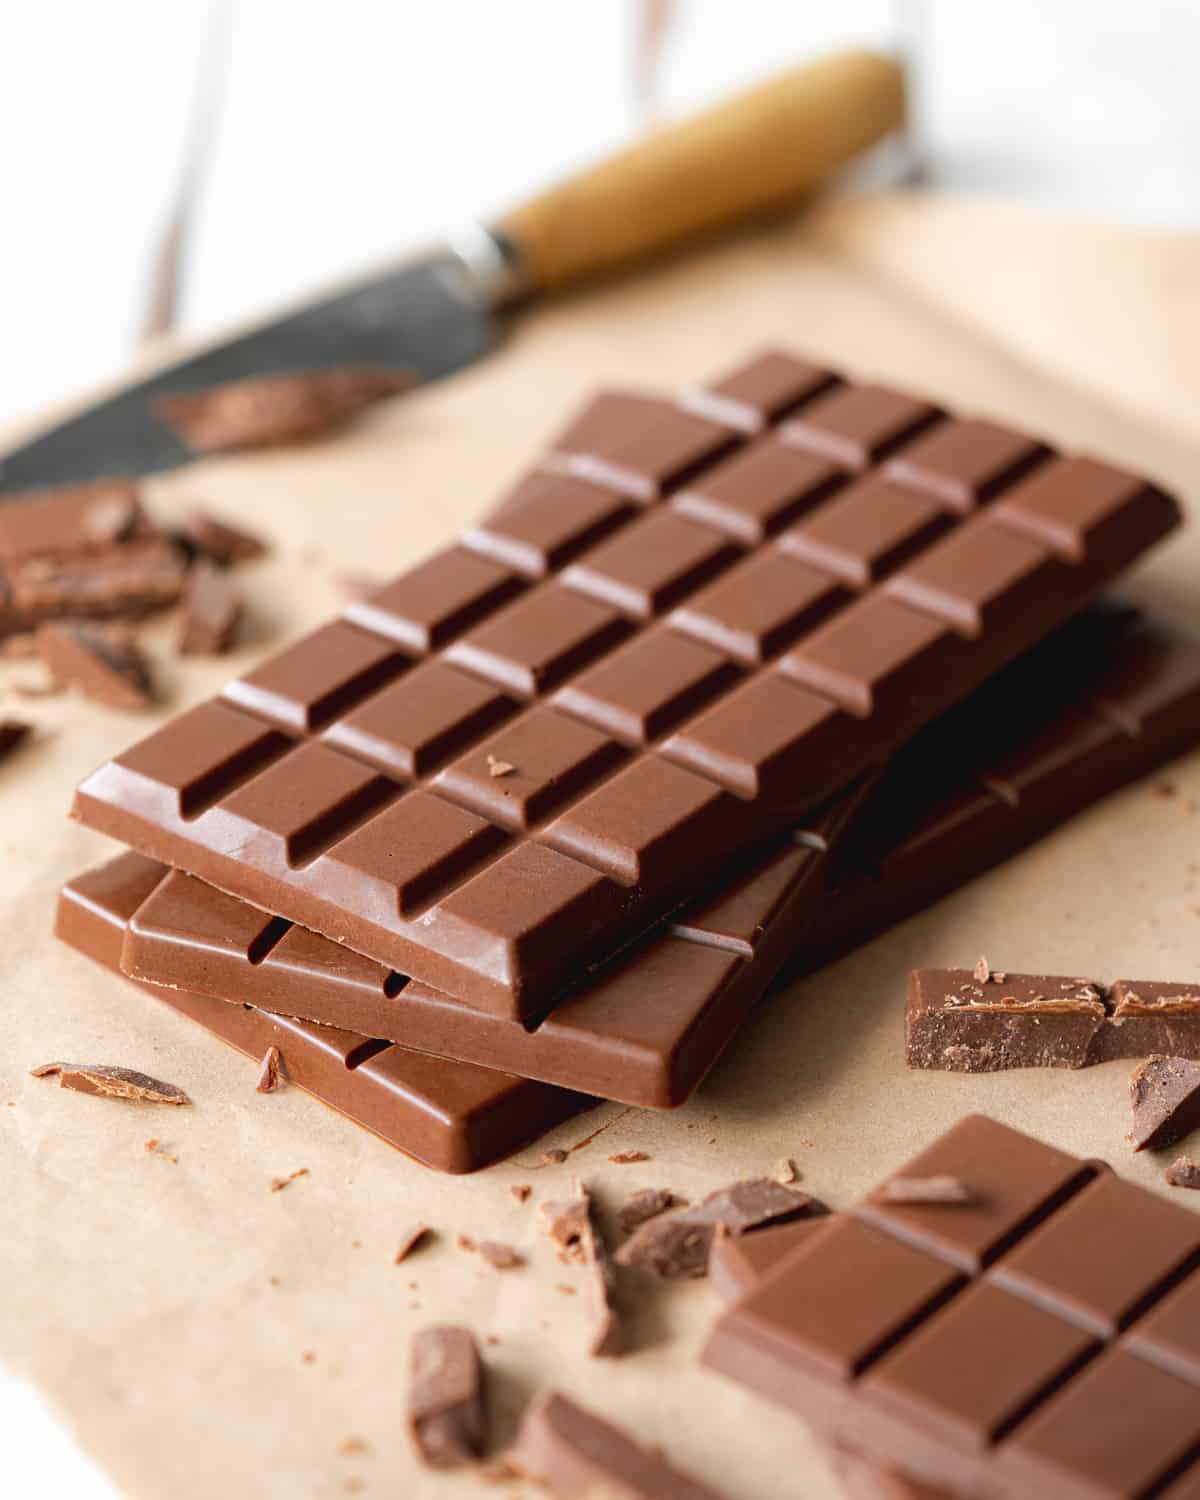
- Solid Texture - Chocolate that "snaps" and isn't soft or fudgy.
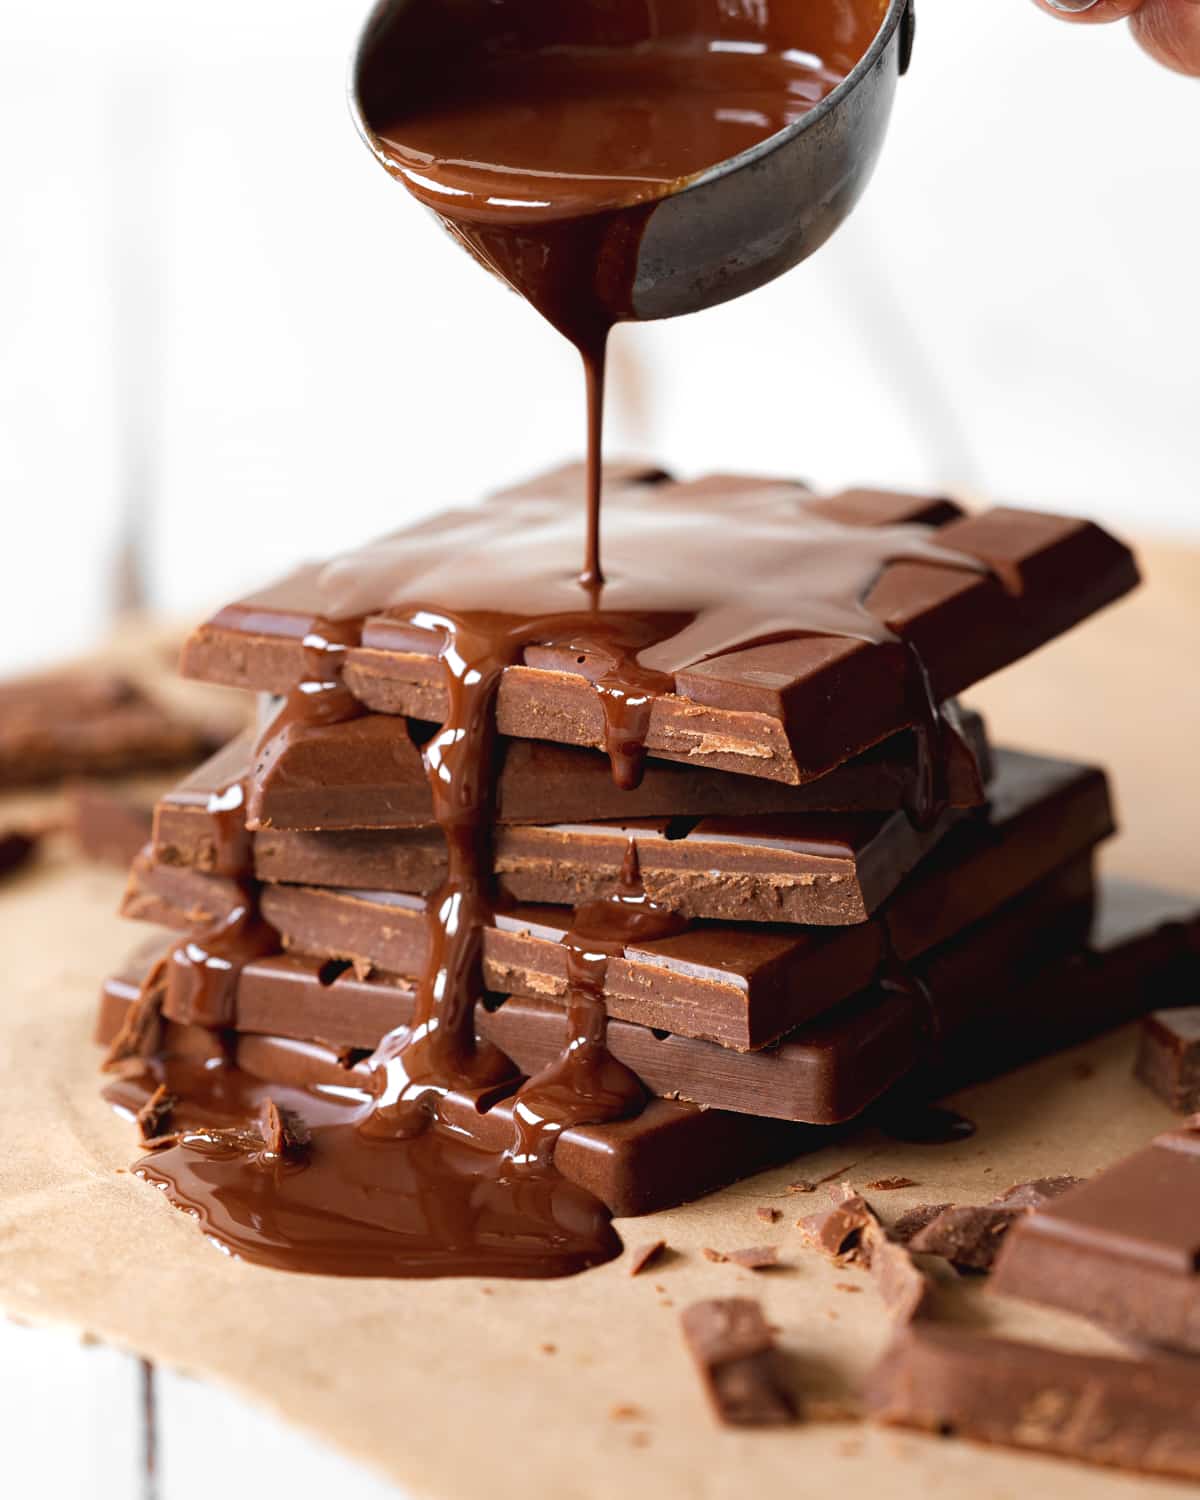
- Versatile - This chocolate melts beautifully and can be used as the base of many vegan chocolate desserts. These dairy-free chocolate bars also make a great gift, you can get creative by adding nuts and flavorings to them as well.
- Made With Real Cacao - This recipe uses a combination of cacao base ingredients to create a delicious chocolate bar.
- Allergy-Friendly - Not only is this chocolate dairy-free, but it's also naturally gluten-free and has a refined sugar-free option.
If you're a chocolate lover like me and are looking for more vegan chocolate recipes, you can also find an entire chocolate chapter in my cookbook No-Bake Vegan Desserts.
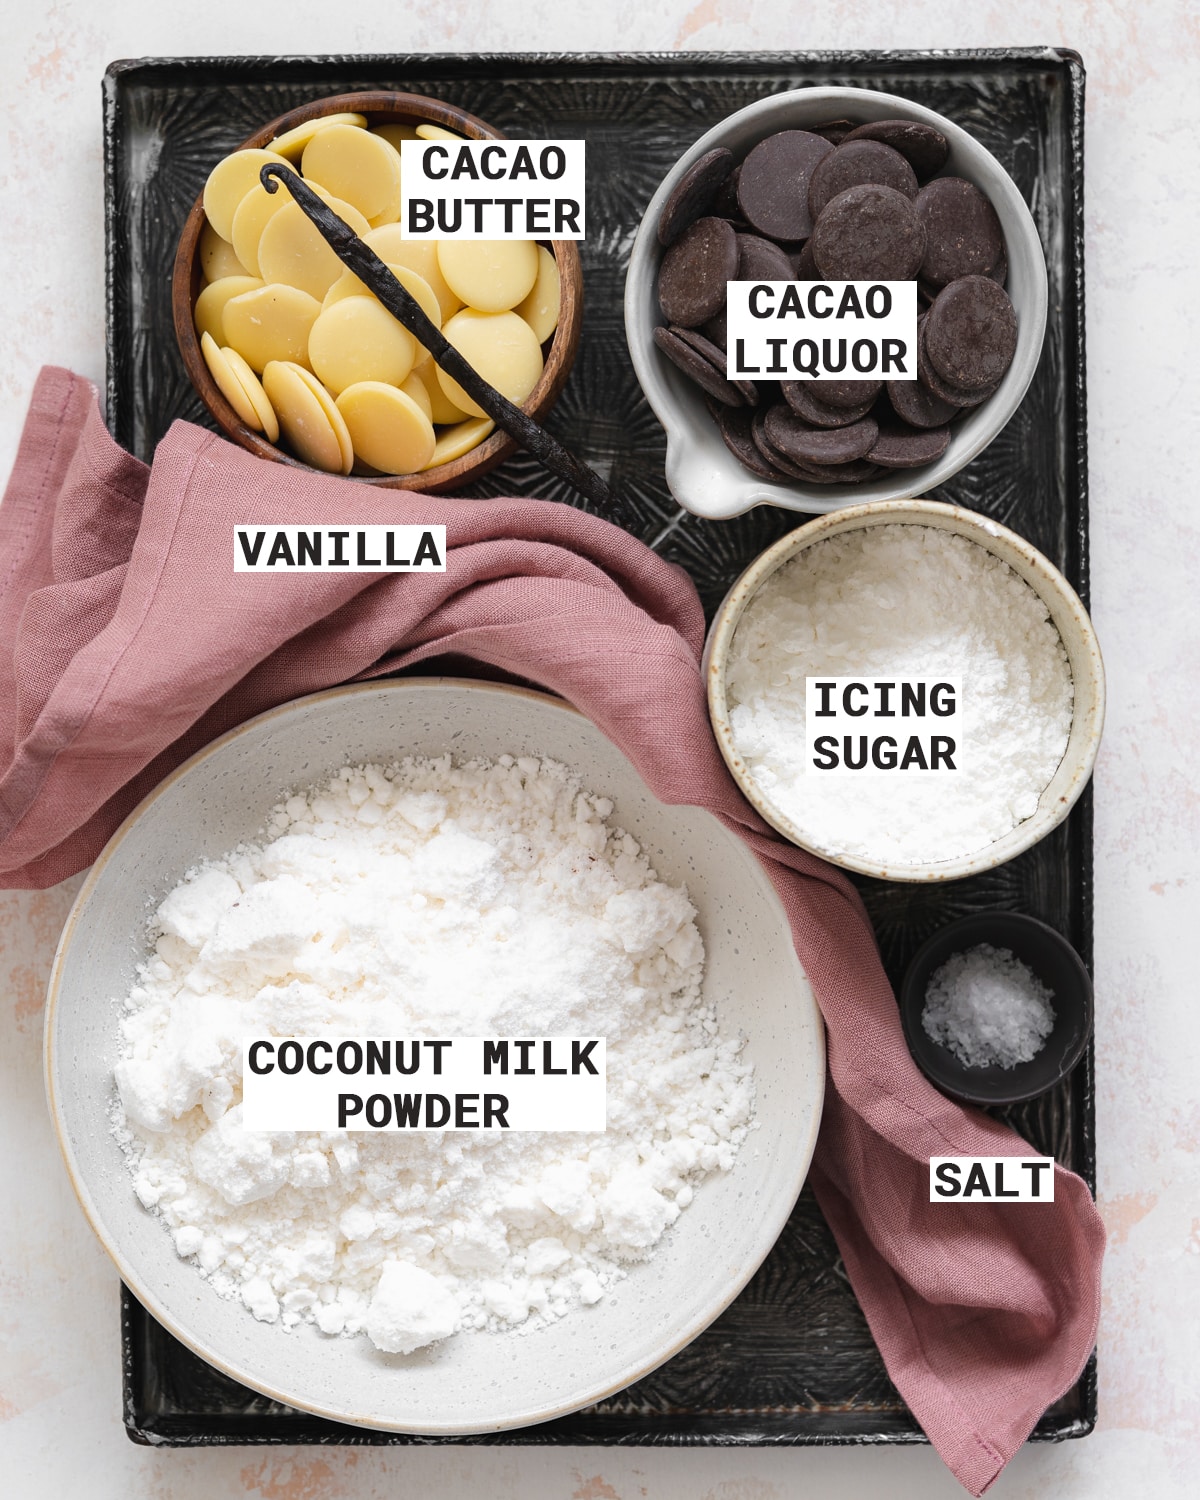
🧾 Ingredients Needed
As mentioned you just need 6 ingredients to make delicious homemade dairy-free chocolate. Here's what to grab:
Ingredient Notes
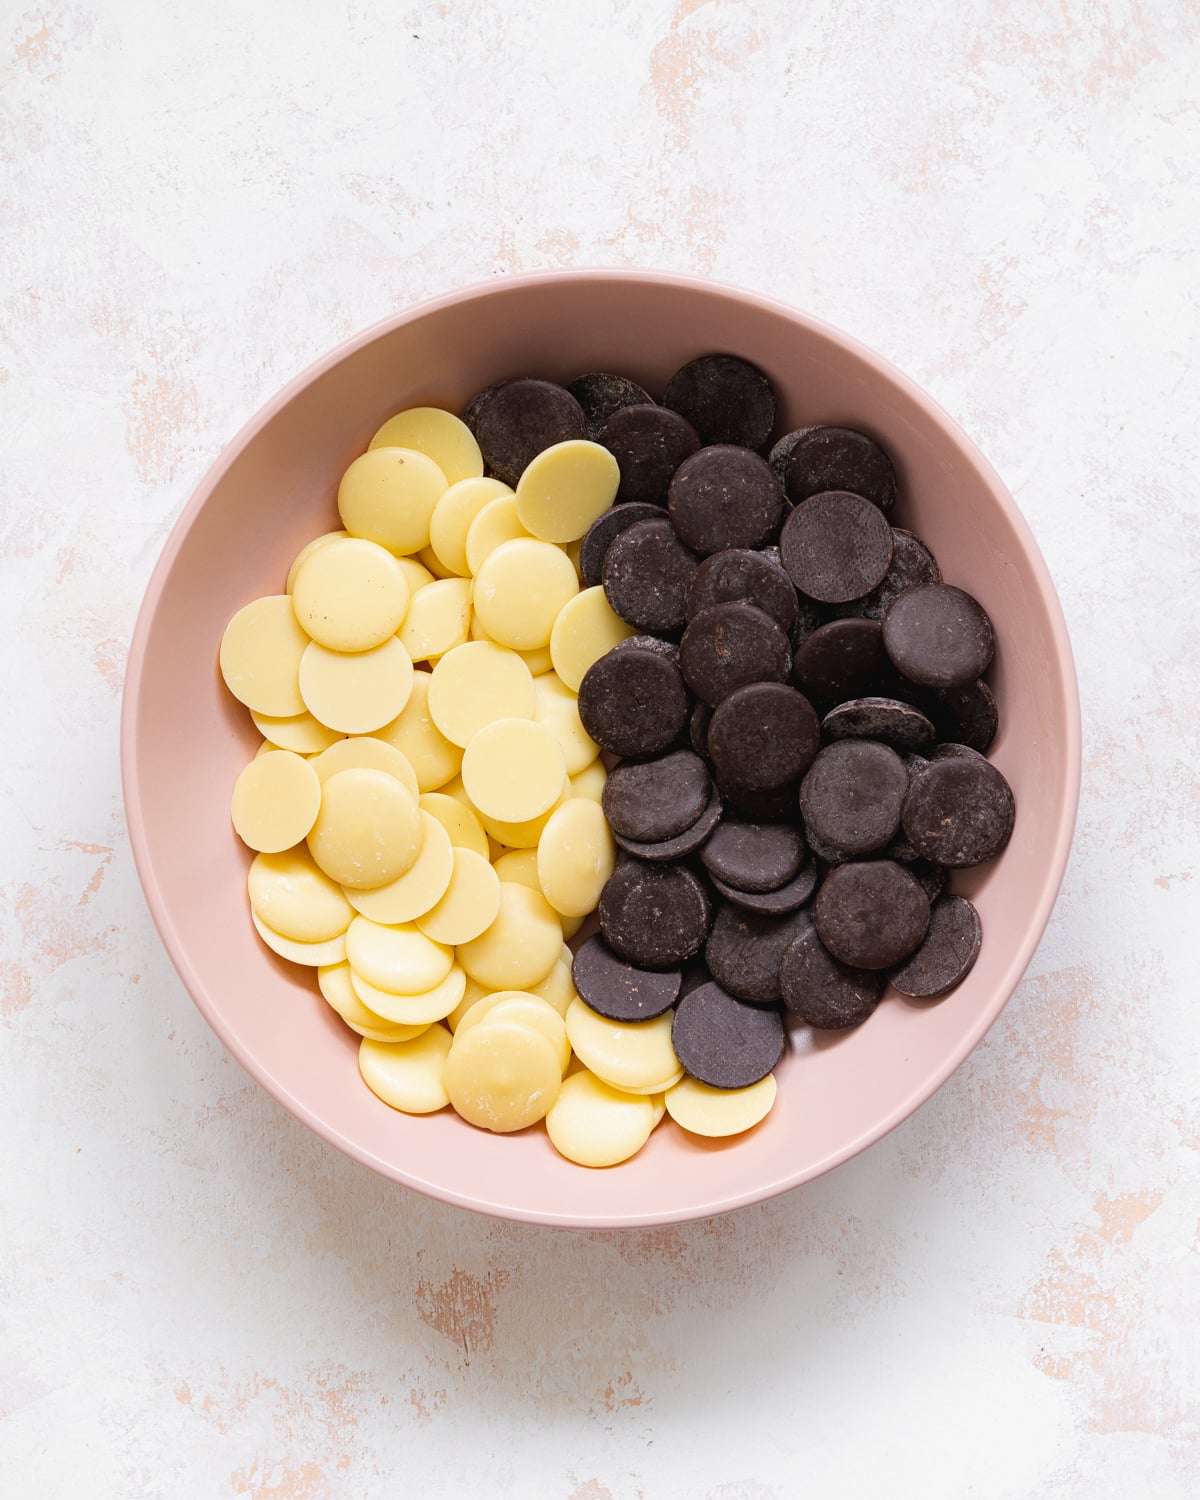
- Cacao Liquor - Also known as cacao paste, is pure cacao mass in solid form. It's usually available in the form of buttons/discs. Although they may smell and look like chocolate buttons, I don't recommend tasting them as is, they are super strong and bitter (tempting, I know). You can also use cacao nibs and make your own cacao paste by roasting them and grinding them down, although you will need a good-quality blender for this method. I know it can sometimes be challenging to get your hands on cacao liquor, so in this case, the cacao nibs method may be more accessible.
- Cacao Butter - This is the fat that's derived from the cacao bean. Again, it's usually available in the form of buttons or in a solid block.
- Powdered Sugar - Personally I find that icing sugar (confectioner's sugar) gives this vegan milk chocolate the smoothest texture. But if you want to keep the chocolate refined sugar-free, you can use coconut sugar. Simply grind down the coconut sugar into a powdery consistency for the smoothest consistency of chocolate.
- Coconut Milk Powder - Be careful to choose a brand that's 100% coconut milk powder, as some coconut milk powder brands have fillers and dairy snuck into them!
- Vanilla - I recommend using a real vanilla pod here, vanilla extract or bean paste will add unwanted moisture to your chocolate bars.
- Sea Salt - This enhances the flavors and balances the sweetness of the chocolate.
🥣 How To Make Dairy Free Chocolate
Find the complete list of ingredients, quantities, and instructions in the recipe card at the end of this post.
Method 1: Using Cacao Paste
This is the simpler method as you can avoid having to roast and blend the cacao nibs. Here's how it's done:
Step 1: Set up a water bath. Add the cacao liquor and cacao butter to a large heat-resistant bowl and place on top of a saucepan with simmering water (known as a bain-marie or water bath). Make sure the water does not touch the bowl.
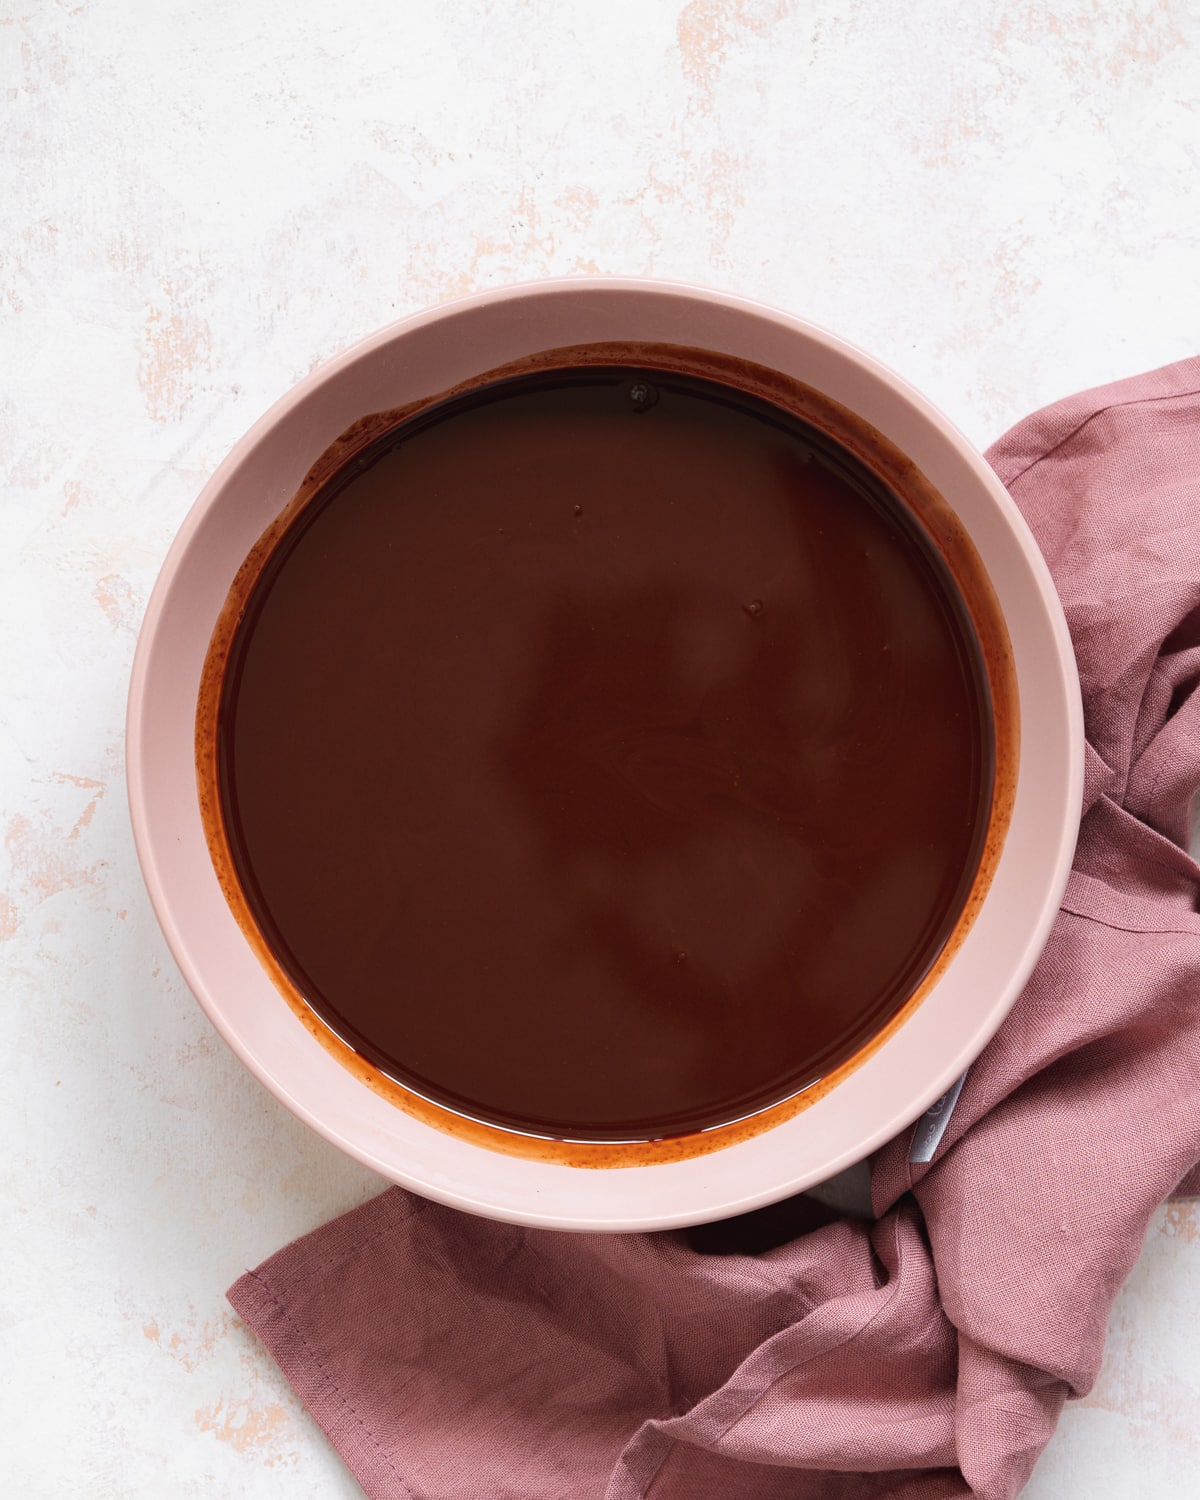
Step 2: Melt. Turn the heat on to medium-low and allow the steam to rise up and gently melt the ingredients. Be careful that absolutely no water splashes into the bowl as water will cause the chocolate to seize.
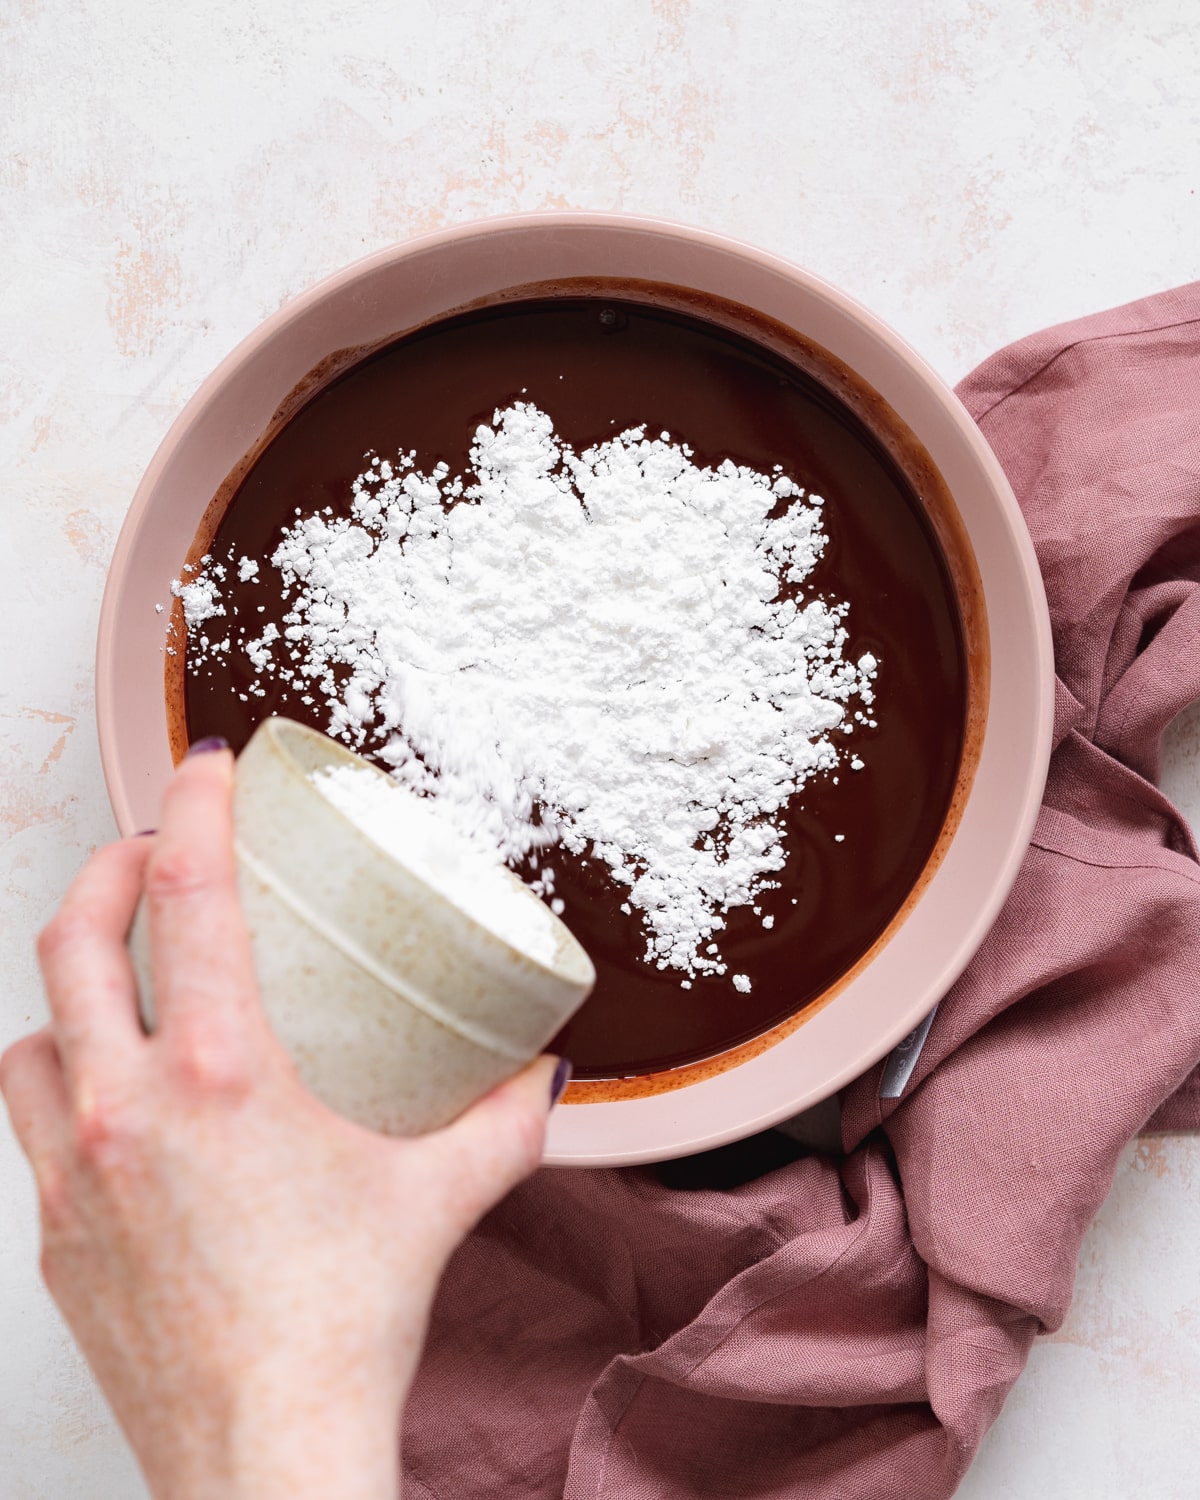
Step 3: Sweeten. Remove the bowl from the water bath, making sure that no water accidentally splashes into the chocolate. Add the powdered sugar and whisk until incorporated into the chocolate mixture.
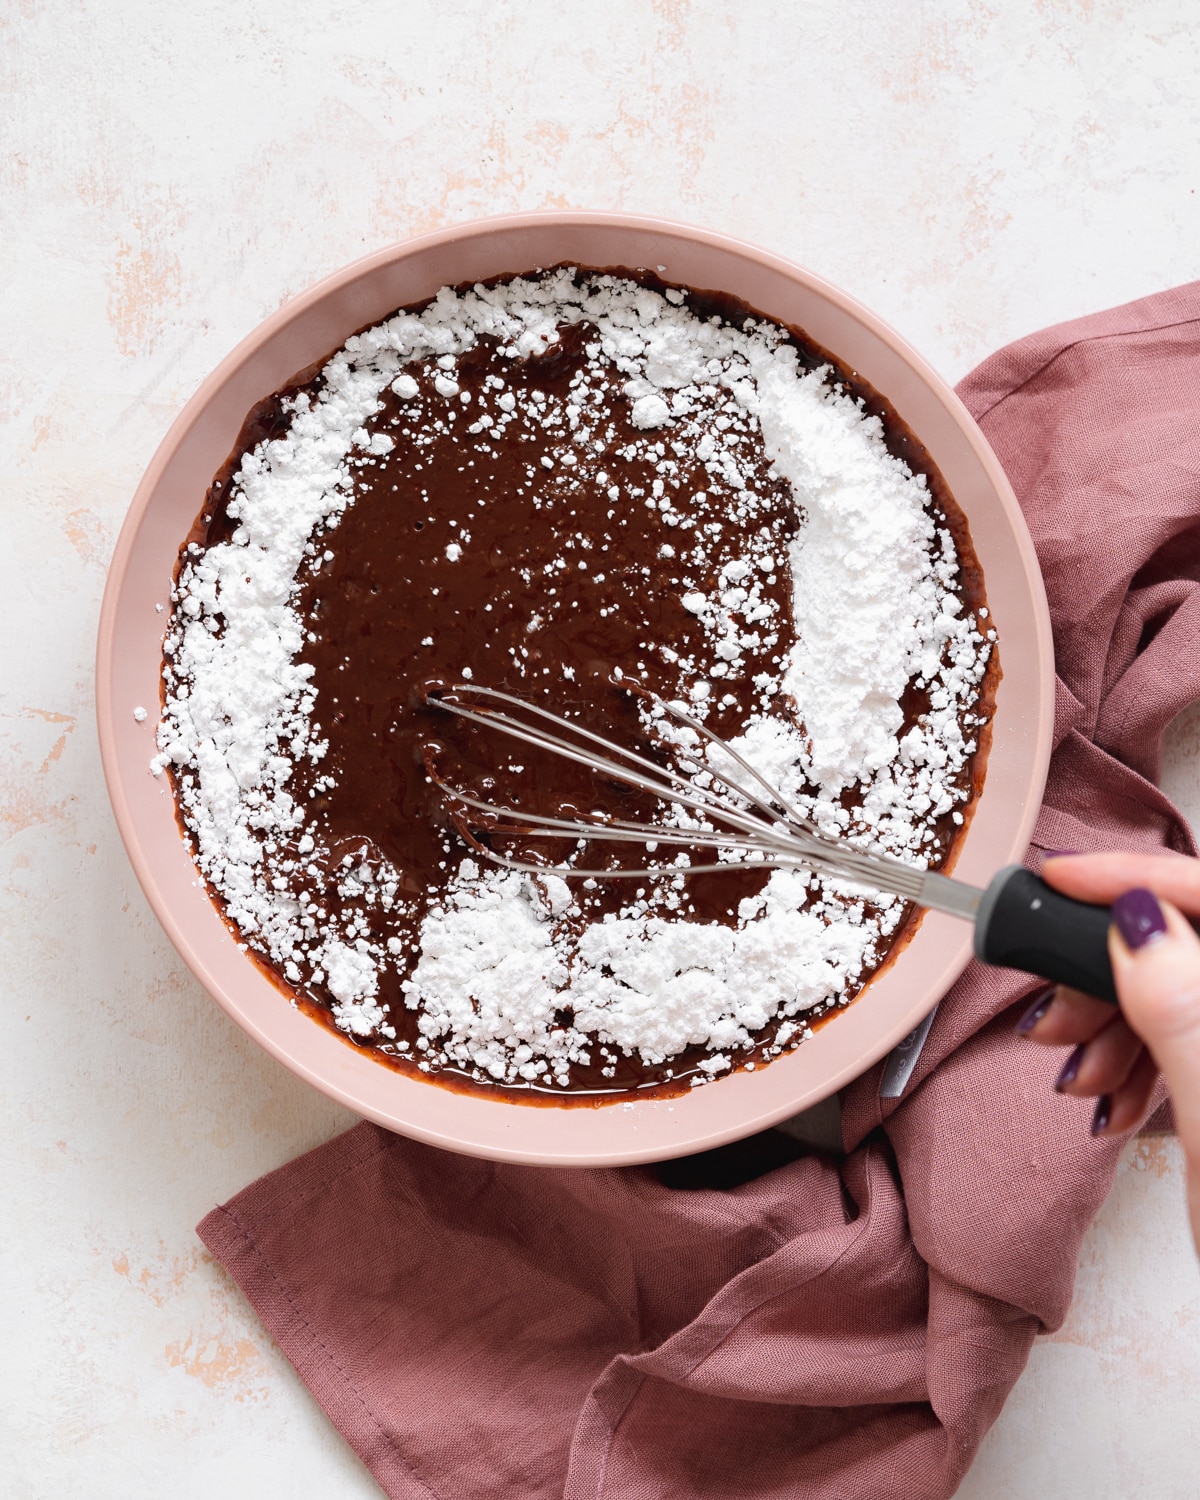
Step 4: Flavor. Add the coconut milk powder, salt, and vanilla and whisk again until the ingredients are evenly mixed.
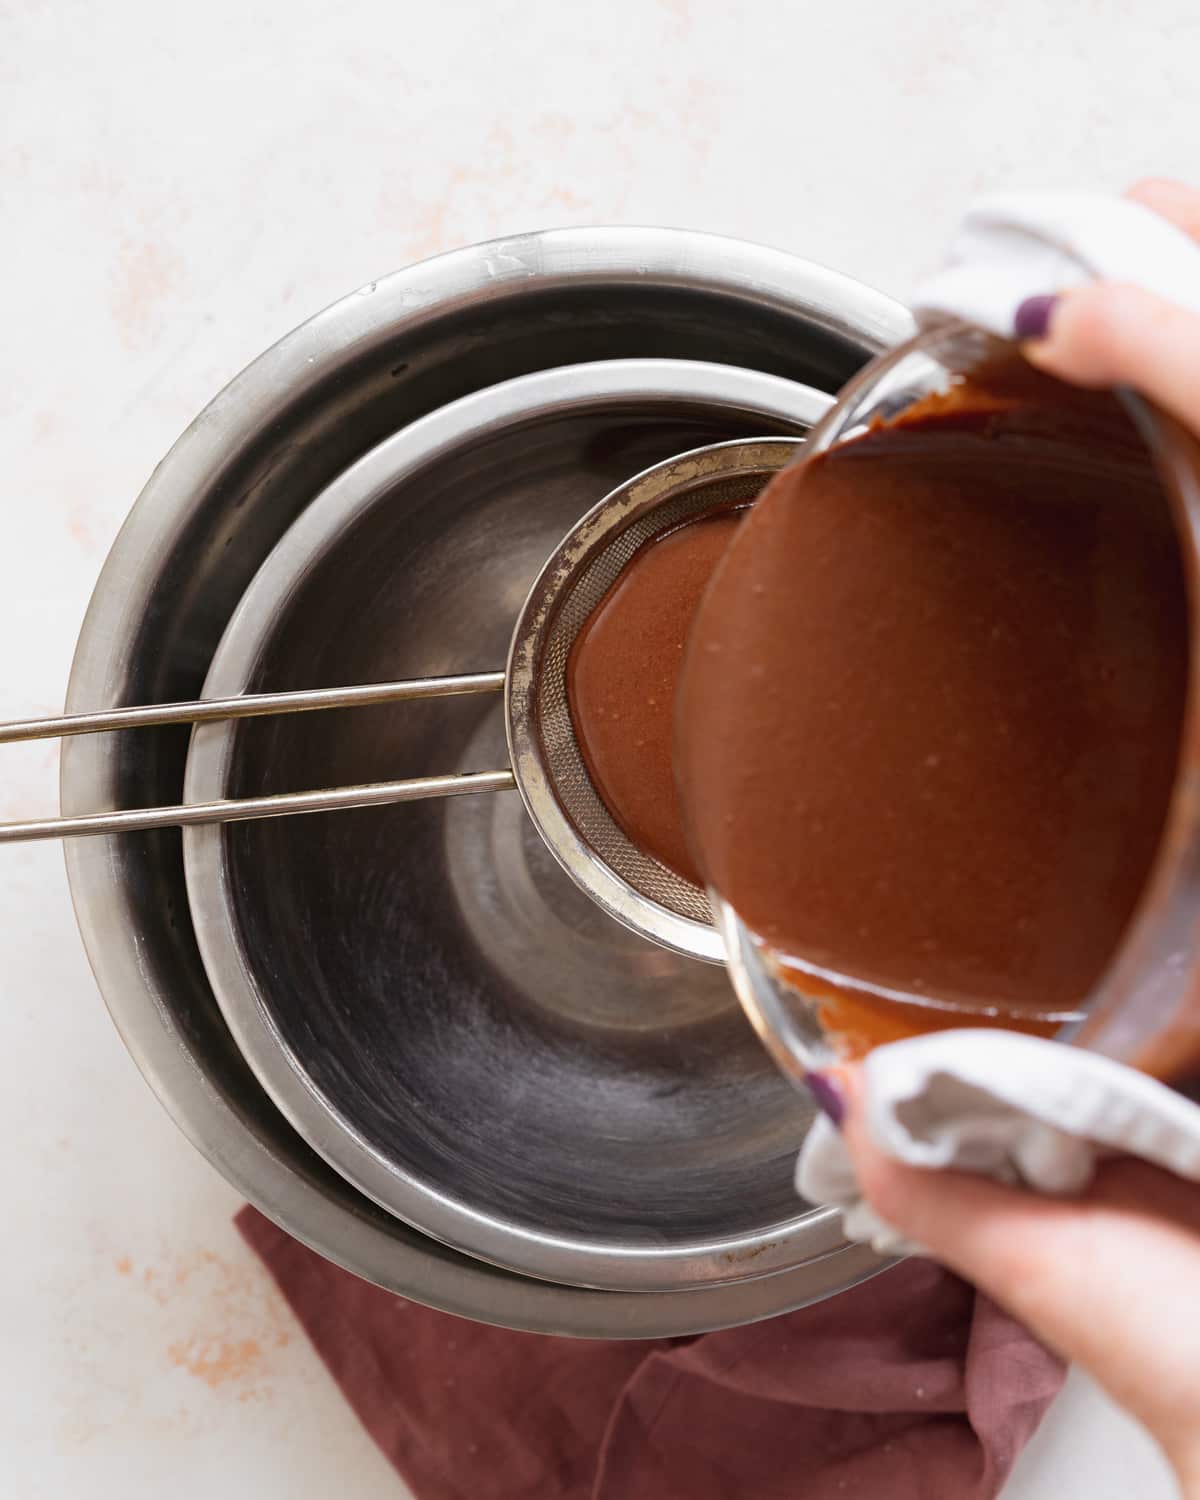
Step 5: Sift and temper. Place the bowl back on the water bath and place a thermostat into the bowl of chocolate to measure the temperature. Bring the temperature up to 50°C (122°F). Remove the bowl from the heat and pass the chocolate through a sieve into a clean bowl. Make sure you dry the bottom of the bowl so that no water/steam gets into the chocolate while transferring it to a new medium-sized bowl.

Step 6: Continue tempering. Set the bowl of chocolate on top of an ice water bath, making sure no water can splash into the chocolate. Gently stir the mixture with a spatula until the chocolate temperature reaches 28°C (82.4°F). Then, place the bowl back on top of the water bath and bring the temperature back up to 30°C (86°F).
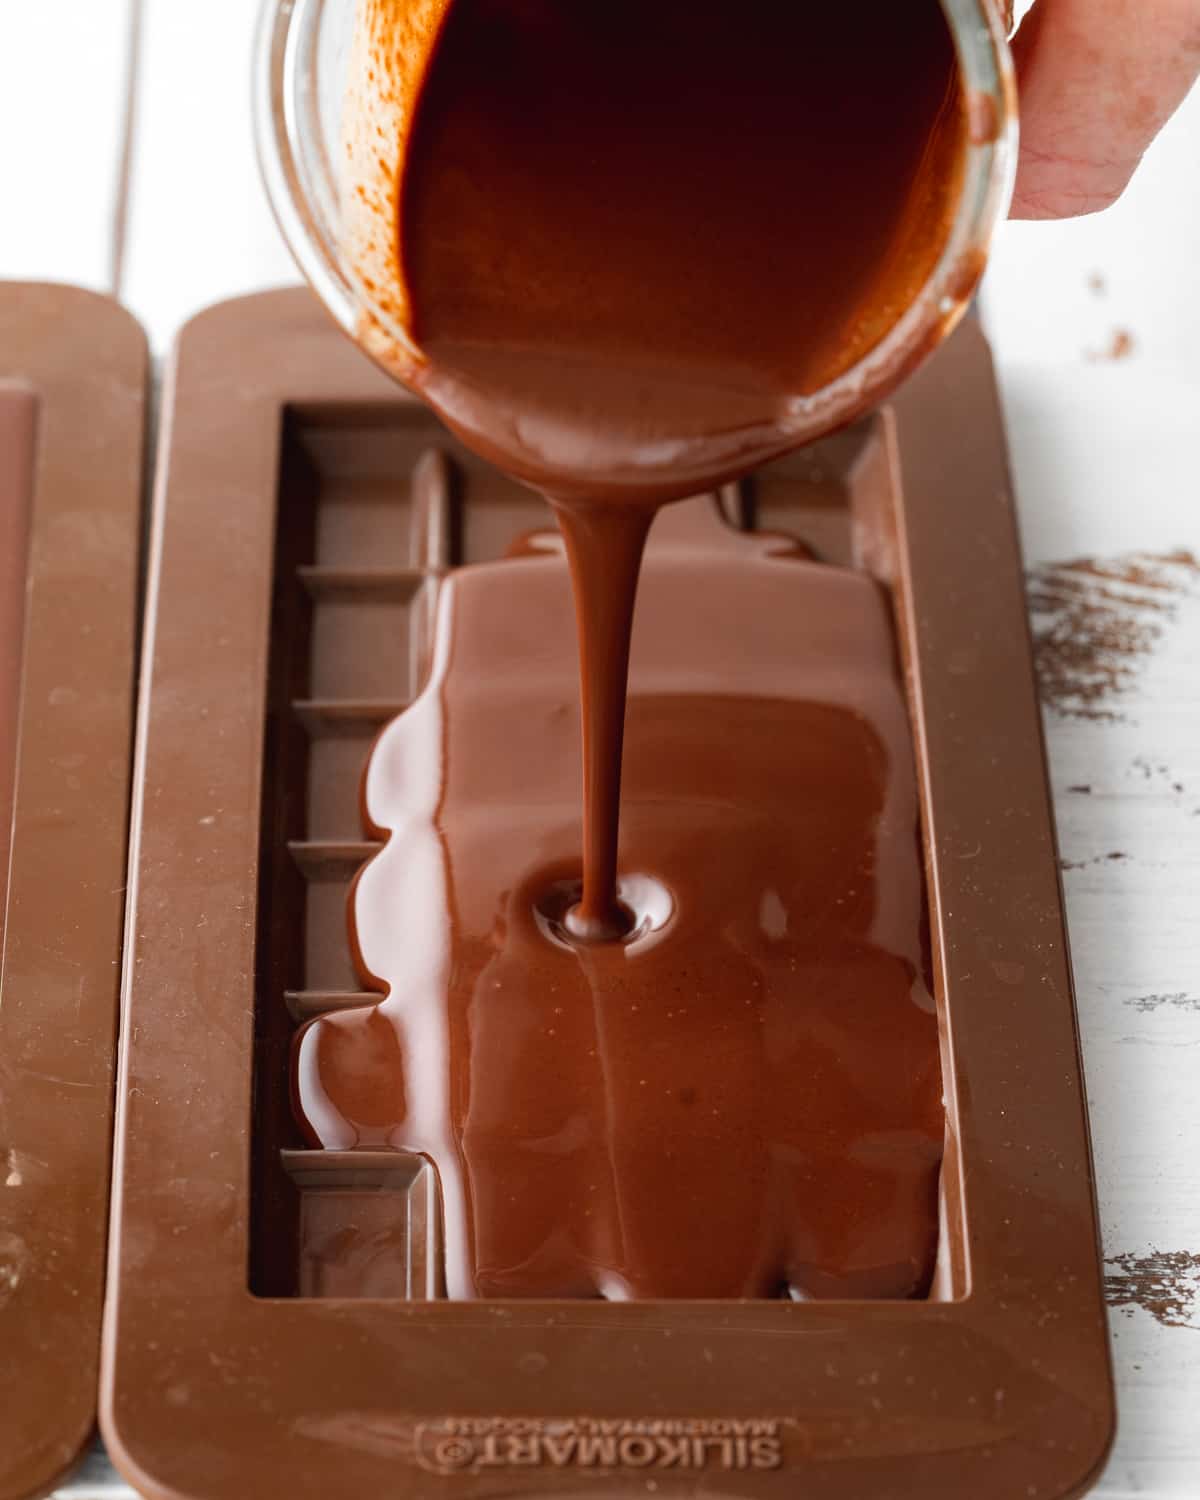
Step 7: Mold and set. Divide the chocolate into the silicone molds and place it in the fridge to chill for at least 20 minutes. This recipe will make 5 large bars.
Method 2: Using Cacao Nibs
In this method, the main difference is you'll be using cacao nibs and making your own cacao paste. This extra step will involve roasting the cacao nibs until they're toasted and smelling fragrant and then blending them into a paste.
I find the best way to get them into a paste is to add the solid cacao butter to the blender with the nibs as they will melt down really fast once blended and help to keep the ingredients from sticking too much to the sides of the jug.
📝 Recipe Tips
1. Prepare Your Equipment
It kinda goes without saying, but for this recipe in particular it is important to have all your bits and bobs ready to go. The last thing you want is to be fumbling around trying to get a water bath ready mid-chocolate making! So read the recipe, read it again, and get all of your equipment and ingredients prepped in advance.
2. Avoid Water & Liquids
Water, and any other liquid that is. Traditional chocolate recipes are based on fats. If the liquid is added to the mix this will cause the chocolate to seize. Basically, your beautiful shiny chocolate will go dull and clump together.
Although you may be able to recover seized chocolate by adding more liquid, at this point it will be like ganache or fudge, and won't set like regular chocolate. So remember, the most important thing when creating a chocolate recipe is to AVOID LIQUIDS at all costs.
3. Use Powdered Sugar
It's also a good idea to avoid using liquid sweeteners such as maple syrup or agave. The key is to use sugar that has a very fine powder consistency such as icing sugar. Using granulated sugar will give your chocolate a gritty texture, as sugar crystals need water to dissolve (which we're avoiding in this chocolate recipe).
For a refined sugar-free option, I recommend using coconut sugar that has been blended down into a powdery consistency. This step will take a little patience, but it will be totally worth it to give you the smoothest consistency possible for homemade chocolate.
4. Temper The Chocolate
Have you ever wondered why some chocolate is shiny and snaps when you break off a piece? The shine in chocolate is traditionally created by "tempering" which is the process of melting and cooling chocolate in order to form beta crystals in the cacao butter.
Some cheaper brands of chocolate skip this method and coat chocolate with shellac, which is a resin secreted by the female lac insect! If you've ever considered tempering chocolate before, chances are this may be something that you have avoided thinking it was a task only cut out only for master chocolatiers.
I am 100% guilty of this, and although I'm not going to sit here and lecture on the correct way to temper chocolate, as it is very much an art and I still have a lot to learn, in the below recipe I will share with you how I was able to get a nice shine and snap from the chocolate without too much effort by a using a method referred to as "the seeding method".
This article on how to temper chocolate by BBC Food goes into more detail.
🍽 Serving Suggestions
There are so many ways to use homemade dairy-free chocolate, here is just some of the endless applications:
Candy Bar Coating - Use it to coat homemade vegan chocolate bar recipes such as Snickers, Crunchies, Toffee Crisp, Mars Bars, Butterfingers, Twix, Reese's, Ferrero Rocher, Creme Eggs, or Bounty Bars.
Chocolate Fruit - Use to coat fruit like this Chocolate Strawberry Bouquet or as a chocolate fondue for dipping fruit.
Frostings - Use it in Chocolate Frosting, Swiss Buttercream, or Chocolate Ganache
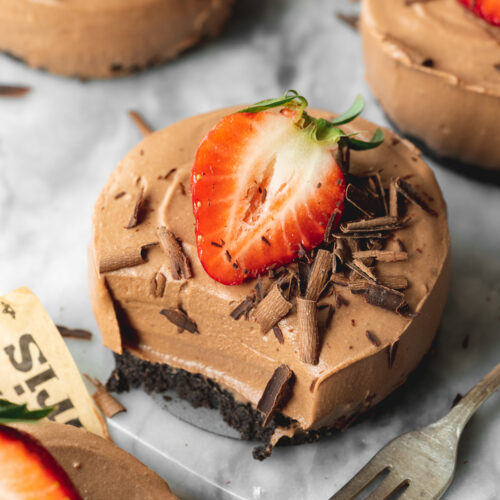
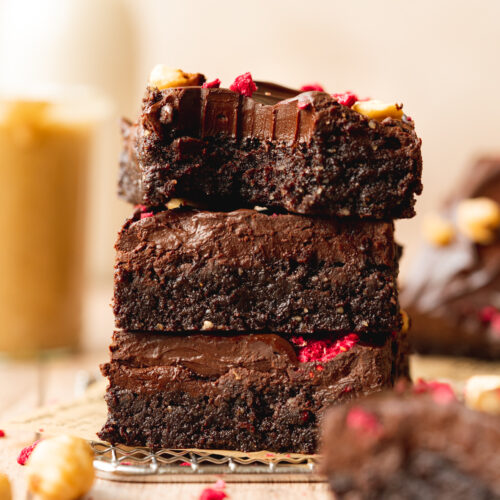
Chocolate Desserts - For Mousse Au Chocolat, Chocolate Cheesecake, Chocolate Tart, Biscuit Cake, or Brownies.
Cookies - It's no secret that I love adding both chocolate chunks AND chocolate chips to cookies. Feel free to roughly chop your dairy-free chocolate and add it to CC Cookies, Choc Hazelnut Cookies, or Pumpkin Chocolate Chip Cookies.
Chocolate Topping - Melt it over vegan ice cream sundaes, this would be so good poured over Chocolate Ice Cream or Vanilla Ice Cream.
📔 Optional Variations
- Soy Milk Powder - To make this vegan milk chocolate without coconut you can try soy milk powder. I personally haven't been able to test this one yet as it's pretty difficult to find here in Ireland but I'd love to know how it went if you give it a go.
- Nuts - You can get as creative as you'd like with these chocolate bars. Try adding nuts such as roasted hazelnuts, and chopped almonds, or go for a fruit and nut bar by adding cranberries and raisins.
- Coconut - Add some shredded toasted coconut to the chocolate before setting for a delicious coconut milk chocolate bar.
- Flavorings - Add a couple of drops of oil-based flavoring such as mint, orange, lemon, or rose.
💬 FAQs
With this recipe, I opted to use cacao nibs, roasting them from scratch instead of using cacao powder as I did in all my previous recipes. The cacao nibs contain both cacao solids and cacao butter. Dry cocoa solids are the components of cocoa beans remaining after extracting the cocoa butter, the fat component. When roasted and blended the cacao nibs convert into a liquid state or cacao paste, otherwise known as cacao liquor.
Personally, I have found that the chocolate made using cacao nibs blended into a paste sets better than when using a combination of cacao powder and cacao butter.
There is also something very therapeutic about smelling freshly toasted cacao nibs, similar to roasted coffee beans, the scent will fill up your house so beautifully that you may mistake your kitchen for Willy Wonka's factory!
Remove the bars from the molds and wrap them in baking paper and place them in an airtight container.
I recommend storing them in the fridge as they can get a little soft if left out at room temperature for periods of time. They will stay fresh in the fridge for at least 2 weeks.
I highly recommend a candy thermometer, silicone chocolate molds and you will need a good quality high-powered blender if using the cacao nibs method.
🍫 More Vegan Chocolate Desserts

Love this recipe? Please leave a 5-star ★★★★★ rating in the recipe card below and consider leaving a comment as well, thanks!
Stay in touch with me through social media @ Instagram, Pinterest, TikTok, and Facebook. And subscribe via email to get all our new recipes!
📖 Recipe
Dairy Free Chocolate (Vegan Milk Chocolate)
Equipment
- 5 Silicone Chocolate Molds (Size: 8.35 x 4.1 x 0.4". Cavity Size: 6.3 x 3.1 x 0.4". Vol: 3 oz)
Ingredients
- 6.3 oz (178 g) cacao liquor (cacao paste) or 1 ½ cups cacao nibs (see method 2 in the recipe instructions)
- 8 oz (226 g) cacao butter
- 1 cup (236 g) dairy-free coconut milk powder can be found in most Asian speciality shops
- 1 cup (120 g) powdered sugar (confectioner's/icing sugar) or coconut sugar finely ground *see recipe notes
- 1 vanilla pod
- ½ teaspoon (3 g) Himalayan pink salt
Instructions
Method 1: Using Cacao Liquor/Paste
- Lay the silicone molds out on trays that you will easily be able to transfer to the fridge later. Cut the vanilla pod in half and scrape out the seeds with the back of a knife, and set the seeds aside for later. Discard the pod or use it to flavor other recipes.
- Add the cacao liquor and cacao butter to a large heat-resistant bowl and place on top of a saucepan with simmering water (known as a bain-marie or water bath). Make sure the water does not touch the bowl but allow the steam to rise up and gently melt the ingredients. Be careful that absolutely no water splashes into the bowl as water will cause the chocolate to seize.
- Remove the bowl from the water bath and add the icing sugar. Whisk well until the sugar has been incorporated into the chocolate mixture. Then add the coconut milk powder, salt, and vanilla and whisk again until the ingredients are evenly mixed.
- Place the bowl back on the water bath and place a thermostat into the bowl of chocolate to measure the temperature. Bring the temperature up to 50°C (122°F). Remove the bowl from the heat and pass the chocolate through a sieve into a clean bowl. Make sure you dry the bottom of the bowl so that no water/steam gets into the chocolate while transferring it to a new medium-sized bowl.
- Set the bowl of chocolate on top of an ice water bath, making sure no water can splash into the chocolate. Gently stir the mixture with a spatula until the chocolate temperature reaches 28°C (82.4°F). Then, place the bowl back on the water bath and bring the temperature back up to 30°C (86°F).
- Divide the chocolate into the silicone molds and place it in the fridge to chill for at least 20 minutes. Once set, remove the bars from the molds and wrap them in baking paper, and place them in an airtight container. Store in the fridge for up to 2 weeks.
Method 2: Using Cacao Nibs
- Preheat your oven to 120℃ (248°F). Line a baking tray with a silicone sheet or parchment paper and spread the cacao nibs out on top of it. Roast the cacao nibs in the oven for 10-12 minutes until they start to brown.
- Once ready, remove the cacao nibs from the oven and place them in your high-speed blender along with the cacao butter (you can add the solid buttons, or finely chopped if using block cacao butter). Blend, blend, blend! You want the cacao nibs to turn into cacao paste/cacao liquor. This should take approximately 5 minutes or so., depending on the quality of your blender. Once runny, pass the mixture through a fine-mesh sieve to make sure there is no remaining grit.
- Repeat all of the steps shown in method 1 at the beginning of the recipe instructions.
Video
Notes
- Powdered Coconut Sugar: Add coconut sugar to a high-speed blender and blend until ground into a powder, starting at low speed and increasing the speed. Scrape down the sides of the blender as needed. This can take 5-10 minutes depending on your blender, the consistency should resemble icing sugar.
- Soy Milk Powder: I personally haven't been able to test this one yet as it's pretty difficult to find here in Ireland but I imagine you could use it in place of coconut milk powder.
- You can get as creative as you'd like with these chocolate bars. Why not try adding nuts such as roasted hazelnuts, chopped almonds, or go for a fruit and nut bar by adding cranberries and/or raisins.
- Add some shredded toasted coconut to the chocolate before setting for a delicious coconut milk chocolate bar.
- Flavorings: Add a couple of drops of oil-based flavoring such as mint, orange, lemon, or rose.
© addictedtodates.com. All content and images are protected by copyright. If you want to share this recipe, please do so using the share buttons provided. Do not screenshot or republish the recipe or content in full. Instead, include a link to this post for the recipe. Thank you!
*This recipe was originally published on January 21st, 2019. The recipe has since been improved and was last updated on October 1st, 2021 to minimize the ingredients used and to simplify the instructions.
